Gesatech Solutions
Your Trusted IT Partner
Quick Excel Tips to Boost Productivity Easily – Print Optimisation
- February 19, 2019
- End-user Productivity
Microsoft Excel’s print optimisation settings allow you to easily print out a worksheet, a whole workbook, or a table inside a worksheet. Without optimising your page layout, your printouts will be cumbersome and could cost you rims of paper in the process. Here is how to efficiently print out your work in Microsoft Excel.
How It Works
Printing from Excel is quite a headache. Unlike in Microsoft Word where you are limited to writing within the printable area, Excel allows you to fill cells as far as to the right and to the bottom as you wish. And when you look up the print preview after completing your work, you would realise a lot of your work falls outside the printable area. This makes printing an Excel sheet a bit trickier than a Word page.
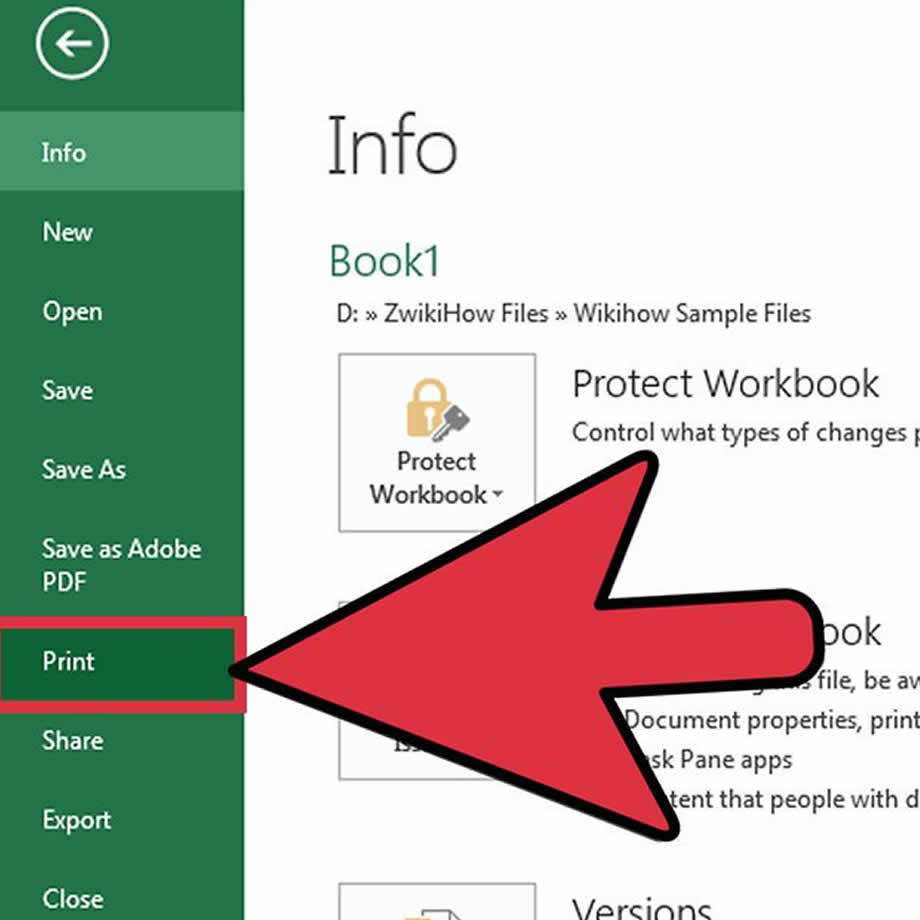
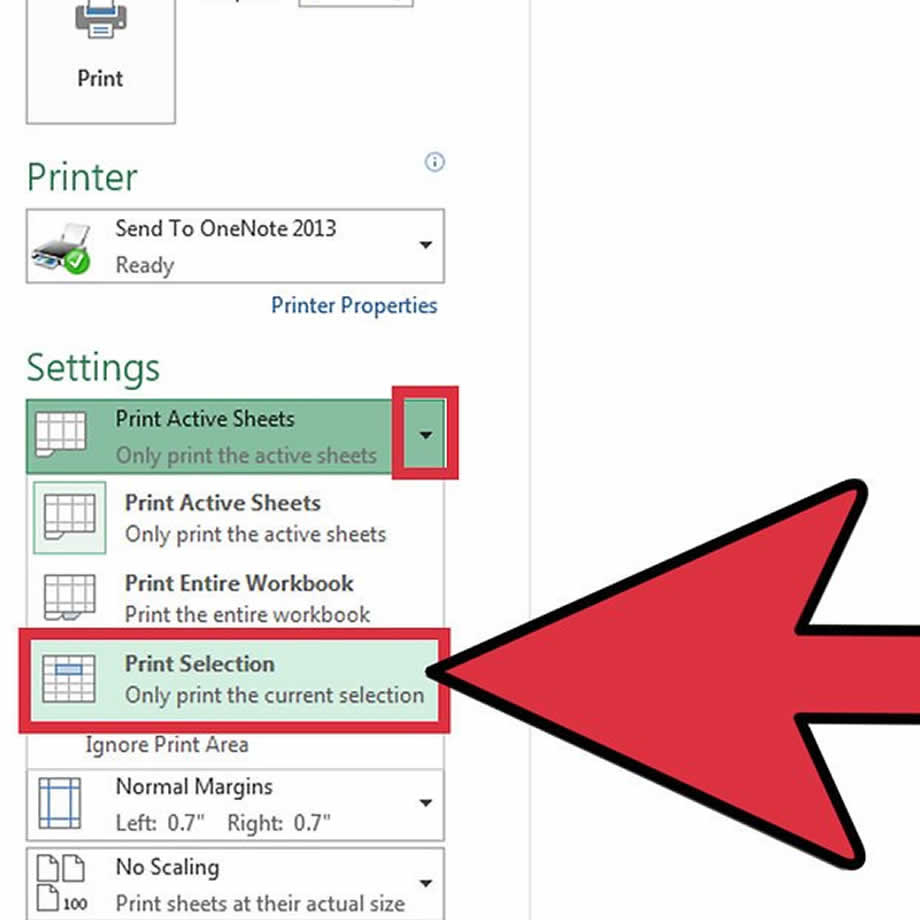
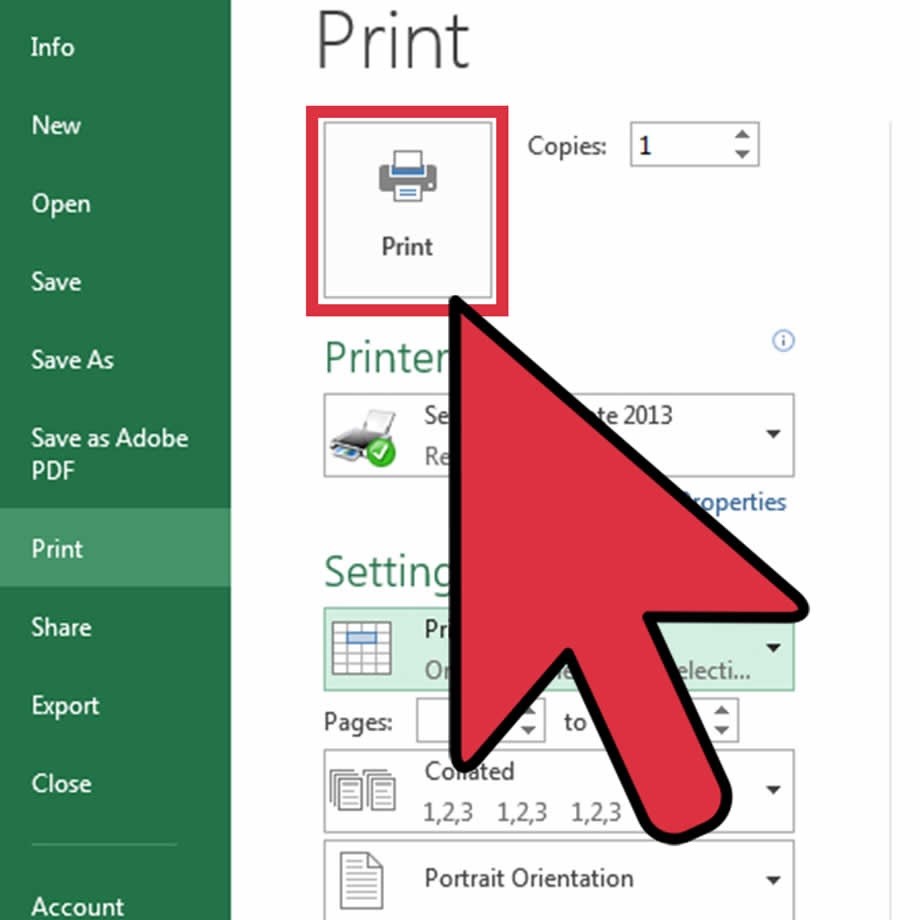
To print a table, select the table you want to print from the worksheet. Click File and then choose Print. Under Settings, select Print Active Sheets and choose Print Selected Table. Click Print to finish the process. The steps are shown below:


To print an entire worksheet, select the required worksheet. Then proceed by clicking File, then Print. Adjust settings if you wish and then click Print again to print out your document.
You can print out several worksheets as well. To do this, simply select the worksheets in question. If they are adjacent each other, navigate to the bottom of the page where the names of the sheets are. Click on one sheet, then while holding down the SHIFT button, click the other sheets to select the remaining sheets you want to print. If they are not next to each other, click on the first sheet. Then holding down the CTRL button, seletct the other sheets. Continue till you have selected all the sheets you wish to print out. After selecting the desired worksheets, you can go ahead and click File, and then Print. Adjust the settings and then click Print again to finalise the operation.
To set up your page for printing, you can create page margins around the sheet so the data doesn’t bleed over the edge when the printout is done. This step allows you to set up your printable page to ensure the right information is visible. After the page setup is complete, do a print preview to see if your data will appear as you expect it to.
Because you work on many rows and columns, it is possible that some information might extend beyond the margins. Scale your Microsoft Excel worksheet to rectify this and ensure your data and cells fit within your working area.
Share this article with your friends

MORE RESOURCES
Contact Details
No. 35/C16
Off Spintex Road
Opposite Global Access
Accra, Ghana
+233-(0)30 297 8297
+233-(0)55 846 8325
Copyright 2017 © Gesatech Solutions


